Tool bags
 Tool Storage
 Made in USA
 Tool Bags By Trade
Quick Answer: Proper duffel packing uses bottom-heavy distribution (shoes and heavy items first), rolling for soft items, strategic compartment use, and accessibility planning (what you need first goes on top). Pack the heaviest items at the bottom center, roll clothing to save space, and keep essentials in exterior pockets for quick access.
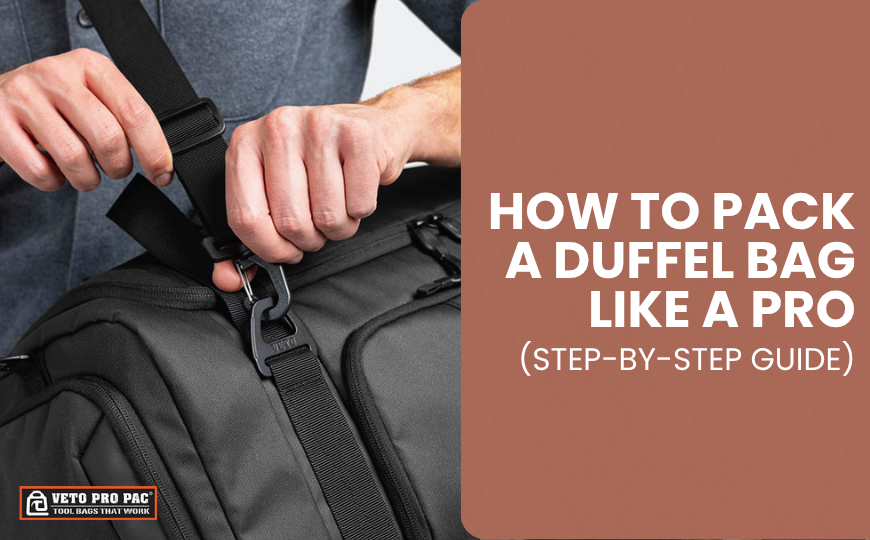
Strategic packing transforms a duffel from a chaos container into an organized travel system. The difference between professionals and amateurs isn’t what they pack. It’s how.
Why Duffel Packing Strategy Matters
Poor packing creates three problems that compound over the course of your trip.
Weight distribution issues. Side-heavy duffels pull on one shoulder, creating strain. Top-heavy bags tip over when you set them down. All the weight in one end makes hand-carrying awkward and exhausting. Your 30-pound bag feels like 50 when the weight isn’t balanced.
Wrinkled contents. Everything compressed together in random orientation emerges looking like you slept in it. Folded items crease at sharp angles. Clothes wadded into gaps develop permanent wrinkles. That work shirt you need for tomorrow’s meeting is unwearable without an iron.
Inaccessible items. You need your toiletries at airport security. They’re at the bottom under 30 pounds of gear. Full bag dump required, creating chaos at the checkpoint and annoying travelers behind you.
Good packing solves all three simultaneously. Balanced carry means even weight distribution across both shoulder-carry and hand-carry modes. You can walk comfortably through airports without the bag pulling you off balance. Quick item retrieval happens without unpacking everything. Toiletries live in accessible pockets. Tomorrow’s outfit sits on top. Electronics occupy protected middle sections. Wrinkle reduction comes from proper rolling technique and strategic placement. Work clothes go on top with minimal pressure. Casual items roll tightly and stack efficiently. The 40-liter capacity handles 4-5 day trips when packed strategically. Amateur packing gets you 2-3 days in the same space. The difference is method, not magic.
What You Need Before You Start
Smart packing begins before you touch the duffel.
Packing cubes organized by category. One cube for tops, another for bottoms. This allows partial unpacking at your destination. Remove the cube you need without disturbing everything else. Compression versions reduce volume slightly but aren’t mandatory.
Shoe bags to keep dirty soles away from clean clothes. Even plastic grocery bags work.
Toiletry bag with water-resistant or waterproof construction prevents leaks from destroying clothing.
Laundry bag or extra packing cube separates dirty from clean during multi-day trips. Nothing worse than mixing yesterday’s sweaty gym clothes with tomorrow’s clean shirt.
Optional items that improve organization: garment folders for suits or dress clothes, cable organizers for electronics and chargers, dry bags for wet swimwear or gym clothes.
Norwalk+ 40L Duffel features that enhance the packing process: collapsible shoe compartment that expands when needed and compresses flat when not in use, water-resistant wipeable compartment for toiletries or dirty clothes, rear zipper access (open the bag from top or back depending on packing configuration), RFID-blocking front pockets for passport and card security, thermoformed base that maintains structure and keeps contents dry.
Learn more: Norwalk+ 40L Duffel
Step 1: The Pre-Pack Inventory
Spread everything on your bed or table. Group by category. Clothes in one area. Shoes together. Toiletries grouped. Electronics and chargers separate. This visual inventory reveals what you’re actually packing and makes editing easier. The editing process matters more than most people think. Do you need three pairs of shoes for three days? Probably not. Are you packing “just in case” items you’ve never actually used on previous trips? Leave them home.
Apply the one-third rule. If your pile looks like it fills more than two-thirds of your duffel’s volume, you’re overpacking. Leave room for items to shift during transit, souvenirs or purchases on return, and proper organization that prevents wrinkles. Most people overpack by 30-40%. They pack for imagined scenarios instead of actual itinerary. Going to a beach resort? You don’t need hiking boots. Attending a wedding? You don’t need gym shoes and running gear “just in case.”
For reference, check proven one-bag travel packing lists to see what experienced minimalist travelers actually carry for week-long trips.
Step 2: Bottom Layer (Shoes and Heavy Items)
Shoes go first. Always. Heaviest items at the bottom create a stable base. Shoes provide structure that prevents soft items from getting crushed. When you set your bag down, the rigid bottom layer protects everything above it.
Shoe packing technique:
- Stuff shoes with socks, underwear, or small items. This maximizes space utilization and maintains shoe shape during transit. Dress shoes especially benefit from stuffing that prevents crushing.
- Arrange heel-to-toe. Interlock shoes to reduce the footprint they occupy. One shoe faces forward, the other backward, with heels nested together.
- Use shoe bags even with separate compartments. Protects against dirt transfer if you need to reorganize mid-trip.
Other bottom-layer items:
- Jeans and heavy pants (rolled tightly) provide additional structure. Books or bulky items go here. Your toiletry bag can live in the bottom layer if it’s rigid and leak-proof.
Weight distribution principle:
Heavy items should center in the bottom, not cluster to one side. When shoulder-carrying, this creates balanced load distribution. When hand-carrying by handles, weight pulls evenly downward instead of tipping the bag. Test the balance before proceeding. Pick up the bag by one handle. It should hang straight, not tilt dramatically to either side.
Step 3: Middle Layer (Rolled Clothing)
Rolling beats folding for duffel packing. Not close. Dramatically better.
Why rolling works:
- Saves 20-30% more space compared to flat folding. Rolled items pack tighter and fill irregular spaces that folded stacks can’t utilize.
- Reduces wrinkles. Fewer sharp creases compared to traditional folds. The tension from rolling actually smooths fabric rather than creating permanent crease lines.
- Creates structure. Rolled cylinders function like building blocks, filling space efficiently and providing stability.
- Enables easy retrieval. Pull one rolled item without disturbing others. Folded stacks collapse when you remove items from the middle.
The proper rolling technique:
- Lay garment flat and smooth out existing wrinkles. Any wrinkles present before rolling become permanent after compression.
- Fold in sleeves and sides to create a rectangular shape. This prevents bunching and ensures even rolling.
- Roll tightly from one end, maintaining consistent tension throughout. Loose rolling wastes space. Too-tight rolling creates excessive wrinkles.
- Secure with rubber band or pack directly into cube. Rubber bands prevent unrolling during transit but can leave slight impressions on delicate fabrics.
What to roll versus fold:
- Roll: T-shirts, casual pants, workout clothes, underwear, socks, lightweight sweaters.
- Fold (or use garment folder): Dress shirts, suits, formal wear requiring crisp presentation.
- Don’t pack: Heavy coats. Wear them during travel instead of consuming precious bag space.
Strategic packing cube usage:
- Cube 1 contains rolled tops. T-shirts, casual shirts, lightweight sweaters all rolled and packed together.
- Cube 2 holds rolled bottoms. Pants, shorts, and athletic wear.
- Loose items fill gaps. Underwear, socks, and belts squeeze into spaces between cubes and along bag edges.
Creating efficient layers:
- Place rolled items horizontally (perpendicular to duffel length). This orientation makes retrieval easier and distributes compression evenly.
- Stack layers like building a brick wall. Offset the seams so items interlock rather than creating columns that can shift.
- Fill all gaps. Empty spaces allow items to shift during transit, creating disorder and increasing wrinkles. Soft items like socks and underwear work perfectly as gap fillers.
- Avoid hollow spaces entirely. If you can press down and feel significant air pockets, you’re not using space efficiently.
Step 4: Top Layer (Access Items and Protection)
The top layer requires the most strategic thinking.
What belongs on top:
- Items you’ll need first at your destination. Toiletries for hotel check-in. Phone charger if your battery is low. Jacket if weather changed since you packed.
- Items you might need during travel. Snacks for the flight. Book or tablet for entertainment. Headphones for noise.
- Wrinkle-sensitive items go last to minimize pressure. Dress shirts, work clothes, anything requiring crisp appearance gets top placement.
The accessibility test:
Can you unzip and grab your toiletry bag without removing other items? If not, reorganize. Airport security checkpoints move fast. Fumbling through your entire bag creates delays and frustration.
Soft items as buffer layer:
- Lightweight jacket on top protects other items from crushing during baggage handling. Provides cushioning if someone drops your bag or stacks heavy items on it.
- Easy to remove if you need room for purchases on return trip. Jackets compress easily and can shift to wearing them when needed.
Electronics placement strategy:
- Never at the bottom. Risk of crushing from weight of everything above.
- Not at very top. Risk of theft if bag unzips slightly or someone reaches in quickly.
- Best location: Middle-upper section, ideally in a padded sleeve or protected pocket.
Step 5: Utilize Organization Pockets Strategically
Pockets exist for reasons beyond “extra storage.”
Internal pockets handle small items that get lost:
- Chargers and cables don’t disappear to the bottom when properly pocketed. Phone charger, laptop charger, watch charger, headphone charging cable all need dedicated locations.
- Adapters and dongles for different countries or device connections live in small pockets.
- Passport and documents occupy the RFID-blocking front pockets. This prevents both loss and wireless data theft.
- Wallet, keys, and sunglasses need quick access that internal organization provides.
- Medications require easy retrieval for security screening and in-flight access.
External pockets for quick access:
- Phone during travel (though it’s usually in your pocket, the duffel pocket provides backup storage).
- Boarding pass or tickets slide into exterior pockets for instant access at gates.
- Snacks for flights or road trips.
- Water bottle if your duffel includes an external bottle pocket (some models do, though the Norwalk+ 40L focuses on internal organization).
The “first night” pocket strategy:
Pack change of underwear, toothbrush, and phone charger in an accessible pocket. If checked bags get delayed at the airport, you have survival essentials. If you arrive exhausted and don’t want to unpack fully, you have what you need for one night.
Step 6: Final Compression and Balance Check
The bag is packed. Now optimize it.
Compression technique:
Press down gently on packed items before attempting to zip. This settles contents and reveals any organizational issues. Don’t over-compress. Excessive compression creates wrinkles and stresses zippers. Use compression straps if your duffel includes them. Tighten after zipping to stabilize contents and reduce bulk.
The balance test:
- Shoulder carry test first. Lift the bag by its shoulder strap. It shouldn’t pull heavily to one side. If it does, redistribute heavy items toward center.
- Hand carry test next. Grab both handles and lift. Weight should feel evenly distributed. If one end dips noticeably, repack to balance the load.
- Set the bag upright. It should stand without tipping.
The zip test:
- Zipper should close smoothly without straining. If you’re fighting the zipper, forcing it closed, or hearing fabric stretch, you’ve overpacked.
- Remove items or reorganize to reduce bulk. Better to check a second small bag than to break your duffel’s zipper mid-trip.
Common Duffel Packing Mistakes
Even experienced travelers make these errors.
Mistake 1: Packing folded instead of rolled. Wastes 20-30% more space. Creates more wrinkles. Makes retrieval harder because you can’t pull individual items from folded stacks without disturbing everything.
Mistake 2: Ignoring weight distribution. All heavy items on one side creates uncomfortable carry and potential strain injuries. All weight at one end makes hand-carrying awkward. Proper distribution matters more than total weight for comfort.
Mistake 3: Overpacking “just in case” items. You don’t need seven outfits for three days. You can rewear pants and shorts. Check proven one-bag travel packing lists to see how minimalist travelers handle extended trips with less than you’re bringing for a weekend.
Mistake 4: Burying essentials. Toiletries needed at security checkpoints buried under clothes require full bag dump at TSA. Phone charger at bottom when battery dies mid-flight creates frustration. Keep frequently-needed items accessible.
Mistake 5: Neglecting dirty clothes strategy. Mixing dirty and clean clothes mid-trip creates laundry chaos. Always pack a laundry bag or dedicate one packing cube to dirty items.
Mistake 6: Overstuffing to maximum capacity. No room for items to shift during transit means everything arrives disheveled. No room for souvenirs or purchases means buying a second bag on return. No tolerance for zipper stress means equipment failure. Leave 20-30% empty space for flexibility.
Trip-Specific Packing Strategies
Different trips demand different approaches.
Weekend trip (2-3 days): Three tops, two bottoms, one jacket. One pair of shoes (wear the other). Minimal toiletries. This leaves substantial room for flexibility or purchases.
Week-long trip (7 days): Four to five tops, three bottoms, one to two jackets. Two pairs of shoes maximum. Full toiletry kit. Plan laundry mid-trip to avoid overpacking. This fills approximately 75% of capacity when packed efficiently.
Gym commute packing: Workout clothes in main compartment, work clothes in packing cube for wrinkle prevention. Gym shoes in the collapsible shoe compartment. Toiletries in the water-resistant compartment. Wet or dirty gym clothes go in a separate bag or the water-resistant compartment on the return trip.
Business travel: Garment folder mandatory for dress clothes. Shoe bags required for dress shoes. Electronics well-organized in internal pockets. Toiletries TSA-compliant in the dedicated water-resistant compartment.
Duffel Packing FAQ
How do I keep clothes from wrinkling in a duffel bag?
Roll clothes instead of folding (reduces sharp creases), use packing cubes to contain and compress items gently, pack wrinkle-prone items on top where they experience less pressure, and don’t overpack (excessive compression creates wrinkles). For dress clothes, use a garment folder or wear them during travel. Hang items immediately upon arrival to release any wrinkles.
Should I use packing cubes in a duffel?
Yes, especially for multi-day trips. Packing cubes organize by category (tops, bottoms, underwear), compress items slightly without excessive wrinkling, and allow partial unpacking at your destination. Remove one cube without disturbing others. Cubes also help separate clean from dirty clothes during trips.
What’s the maximum trip length for a 40L duffel?
Four to five days comfortably, up to seven days if you plan laundry mid-trip and pack minimally. The 40-liter capacity accommodates a week’s clothing for most people using efficient packing techniques. For longer trips, consider one-bag travel principles that emphasize rewearing items and strategic laundry planning.
Can I use a duffel as airline carry-on?
The Norwalk+ 40L measures 12.5″ x 21″ x 10.5″, which fits most airline carry-on restrictions (typically 22″ x 14″ x 9″). Duffels’ soft construction allows slight compression to fit overhead bins. Check your specific airline before travel. Partially-packed duffels can fit under seats better than rigid suitcases.
How do I pack shoes without dirtying clothes?
Use shoe bags (even plastic grocery bags work), stuff shoes with socks to maintain shape and maximize space, pack heel-to-toe to reduce footprint, and utilize a separate collapsible shoe compartment that isolates shoes completely from the clothing area. Even with a separate compartment, shoe bags provide extra protection if you need to reorganize mid-trip.
Should heavy items go at the bottom or top of a duffel?
Bottom, always. Heavy items at the bottom create a stable base and proper weight distribution for comfortable carrying. Center heavy items rather than placing them all on one side. Top-heavy duffels are awkward to carry and prone to tipping when set down.
How do I pack toiletries in a duffel bag?
Use a waterproof or water-resistant toiletry bag to prevent leaks, pack full-size bottles only if necessary (travel sizes save weight and space), ensure all bottles are sealed properly and consider placing them in plastic bags as backup protection.
What’s better for weekend trips: duffel or backpack?
Duffels offer more capacity and easier loading (wide top opening). Backpacks provide more comfortable carry for longer walks and keep hands free. Choose based on your travel style. Airport-to-hotel travel favors duffels. Walking-intensive trips favor backpacks.
Your duffel shouldn’t be a chaos container where everything tumbles together.
Strategic packing—shoes and heavy items at bottom, rolled clothes in the middle, access items on top—transforms your 40L duffel from a simple bag into an organized travel system.
The method matters more than the gear, though professional-grade construction makes execution easier. The Norwalk+ 40L provides the structure, organization, and durability that support proper packing technique.
Start with these six steps. Practice with a weekend trip. Adjust based on what works for your specific needs.